Scale out Team Foundation Service Build Server
Overview
Some Visual Studio projects hosted on tfs.VisualStudio.com (formally known as tfsPreview) require specific build environment or the installation of extra components for the build to succeed. For instance, building Windows store projects requires the build server machine to have Windows 8 operating system and Visual Studio to be installed, building a BizTalk project requires the BizTalk SDK to be installed on the build servers, building Lightswitch applications with extensions requires Visual Studio and the extensions to be installed on the build servers and the list goes on.
In this article, I will setup an on premise Build Server to build Windows Store applications that are hosted in tfs.VisualStudio.com. This article assumes you already have an account with tfs.VisualStudio.com and already have a physical machine or VM with Windows 8 as an operating system and Visual Studio 2012 Express for Windows 8 or higher.
Problem
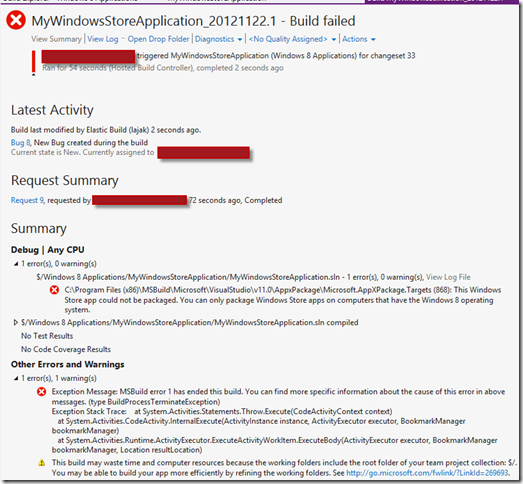
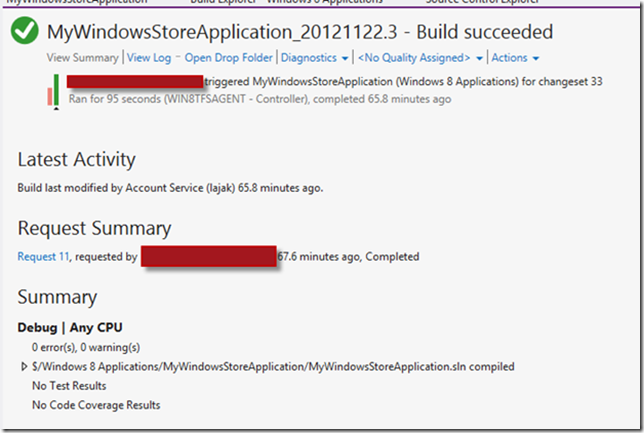
In this article, I have a Windows Store application named “MyWindowsStoreApplication” which is checked in to tfs.VisualStudio.com. Building the MyWindowsStoreApplication using the “Hosted Build Controller” and agent will fail to build as shown in the following figure
The TFS Build fails with the error indicating that Windows 8 operating system is required to package the built Windows Store application.
Solution
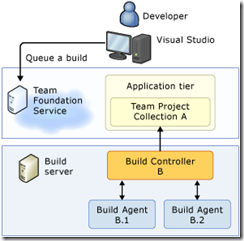
The solution for the problem is to scale out TFS Server’s Build capabilities and host a TFS Build Controller and Build Agent on a computer or VM that has Windows 8 as an operating system.
Prerequisites
The system requirements to build Windows Store applications are:
- Windows 8 Operating System
- Visual Studio 2012 for Windows 8 or higher
Installing TFS Controller and Build Agents
In the following section we will go through the steps needed to create a TFS Build Controller and Build Agents on a local server for the tfs.VisualStudio.com source code repository.
The assumption is that you already have a physical machine or VM that has a Windows 8 operating system and Visual Studio 2012 installed.
The following are the step by step instructions to scale out Tfs.VisualStudio.com build server:
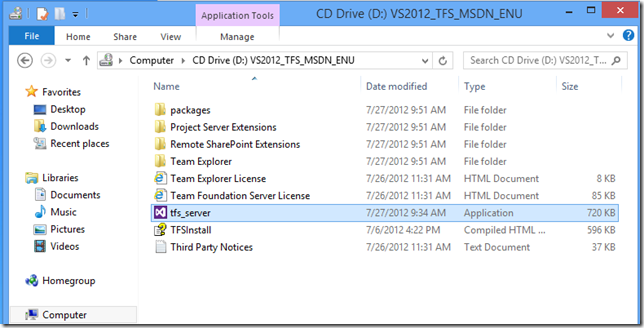
- Insert the TFS2012 DVD or extract the iso file
- Execute tfs_server.exe on the root folder, if you are using TFS Express, you need to execute tfs_express.exe
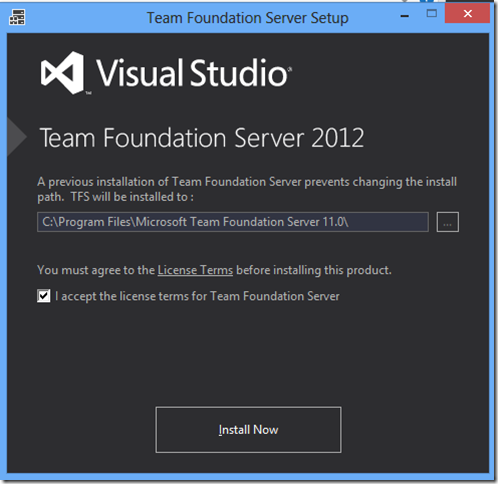
- Accept the license terms for Team Foundation Server
- Click the Install Now button
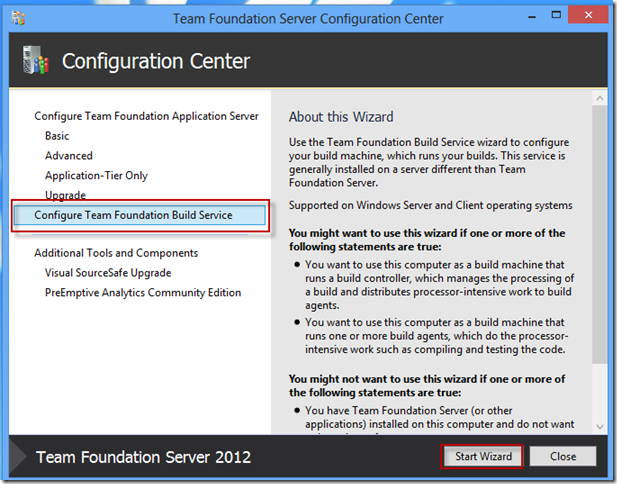
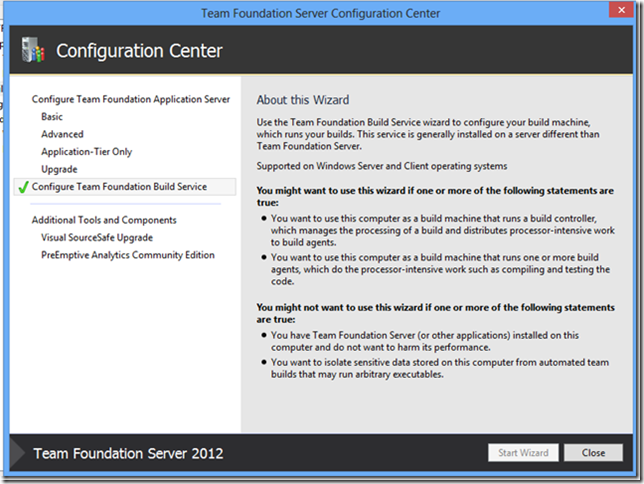
- When the installation is complete, the Team Foundation Server Configuration Center is launched
- Select the Configure Team Foundation Build Service from the list
- Click the Start Wizard button
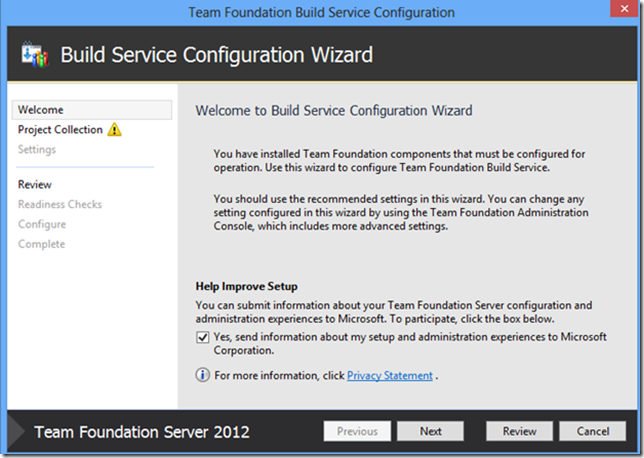
- Click Next in the Build Service Configuration Wizard to move from the Welcome screen to the Project Collection screen
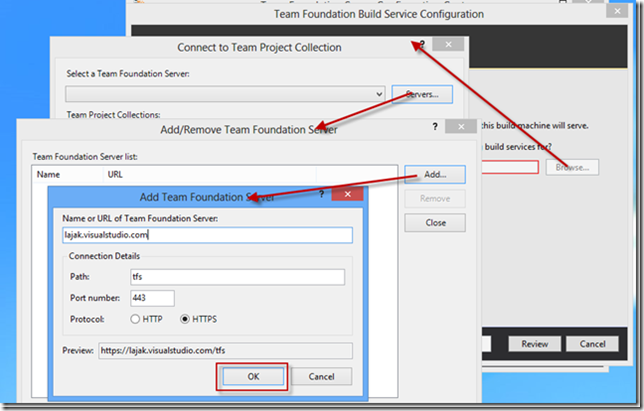
- Click on the Browse button on the Project Collection screen
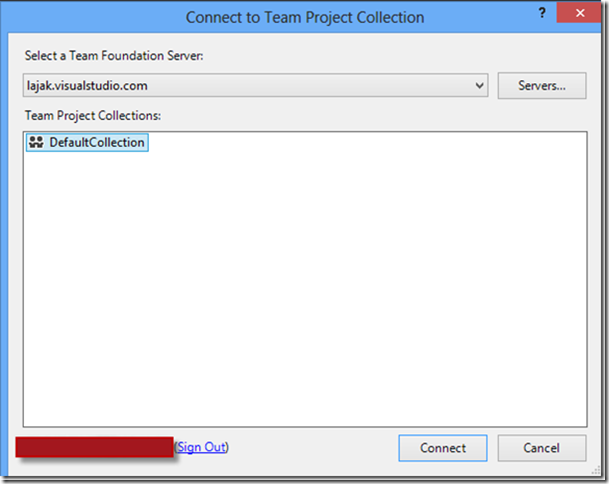
- Click the Servers button on the Connect to Team Project Collection dialog
- Click the Add button on the Add/Remove Team Foundation Server Dialog
- Type the name or URL of your team foundation server and select the HTTPS protocol
- Click the OK button
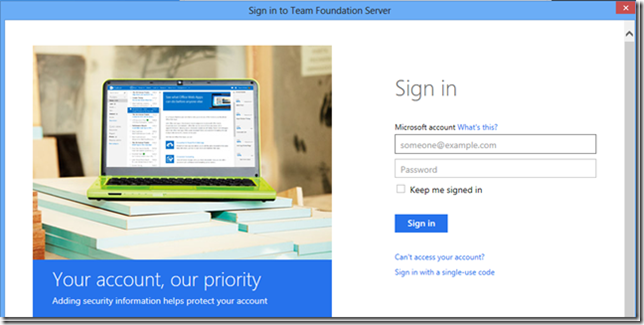
- Once the OK button is clicked, the Sign in to Team Foundation Server window will be launched
- Enter your tfs.VisualStudio.com email address and password
- Click the Sign in button
- Your Team Foundation Server should show up in the Connect to Team Project Collection dialog
- Click the Connect button
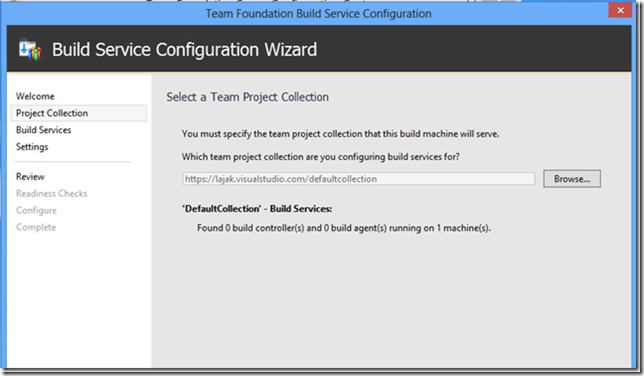
- Now we are back to the Build Service Configuration Wizard, in my case, I haven’t configured on premise TFS build controllers or agent before. Hence, I am getting the Found 0 build controllers and 0 build agents message
- Click the next button
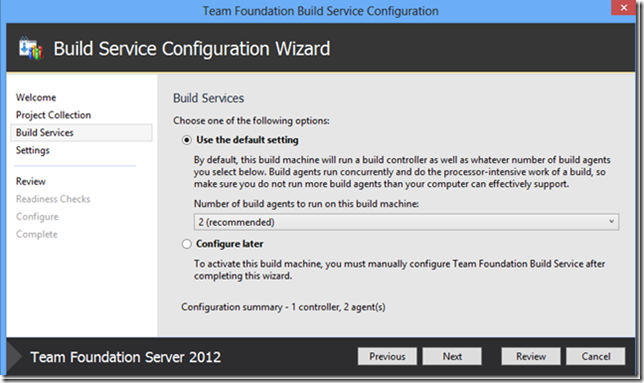
- On the Build Services screen, select Use the default setting. For illustration purposes, I kept the number of build agents to 2. The number of build agents allows to run multiple builds concurrently
- Click the Next button
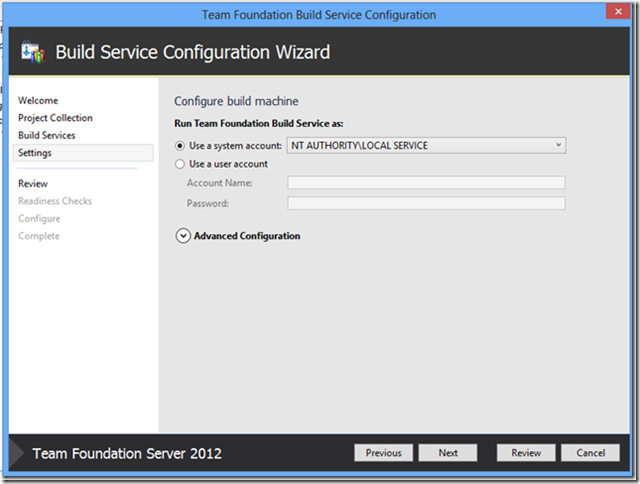
- On the Settings screen, the default option is Use a system account option is selected. The Local Service account is selected by default if the machine is not part of a domain. Network Service account is selected by default if the machine is part of a domain
- Click the Next button
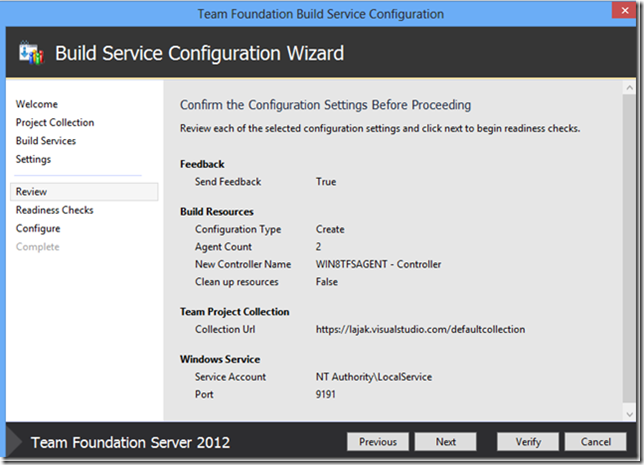
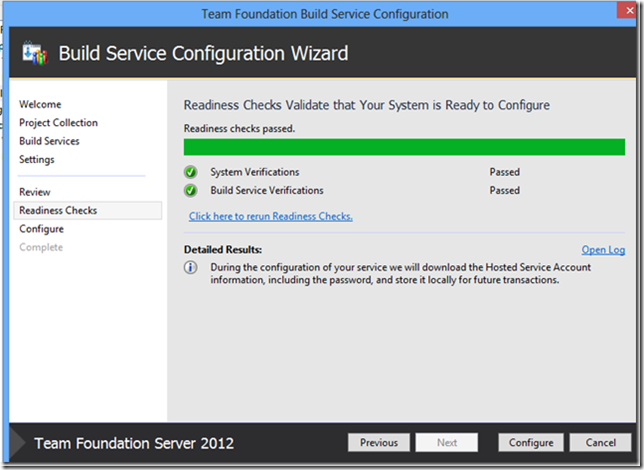
Review the settings and click the Verify button to verify the settings
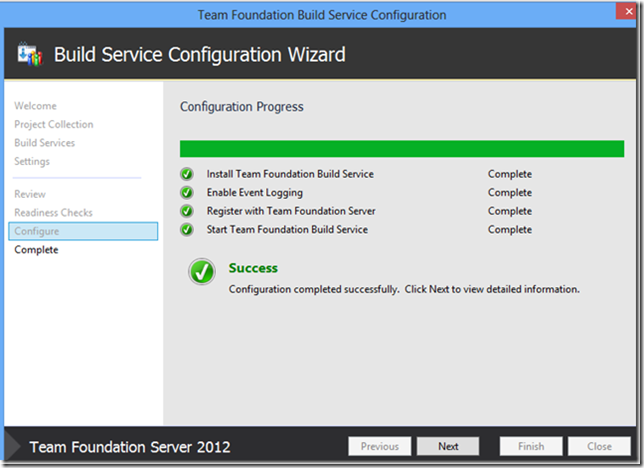
Click the Configure button
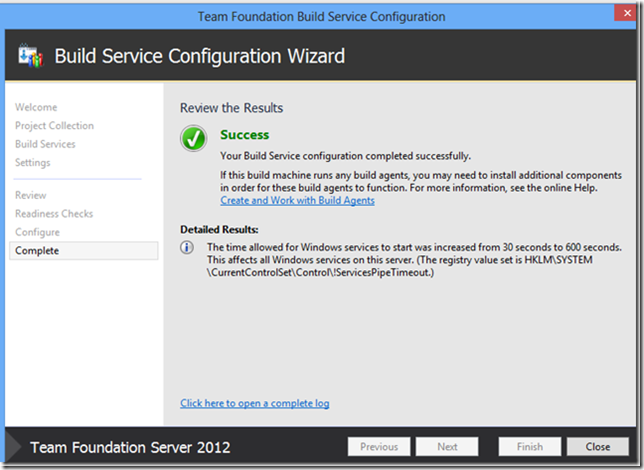
If the configuration is complete successfully, click on the Next button and then close the Team Foundation Build Service Configuration window
- Back at the Team Foundation Server Configuration Center, you should see a green check mark which indicates that the service is configured
- Close the dialog if you don’t want to configure other sections
- Open the Team Foundation Server Administration Console
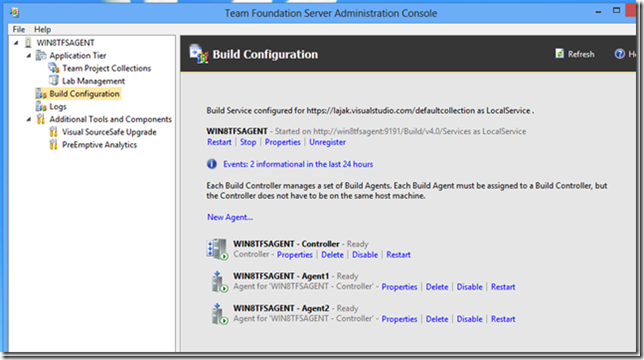
- Click on the Build Configuration node
- Notice that the controller and the Agents are in a healthy state and enabled (green icon). A red error icon would show up instead in the case the controller or the agents are disabled
Modify Build Definition
- Open Visual Studio on your development machine
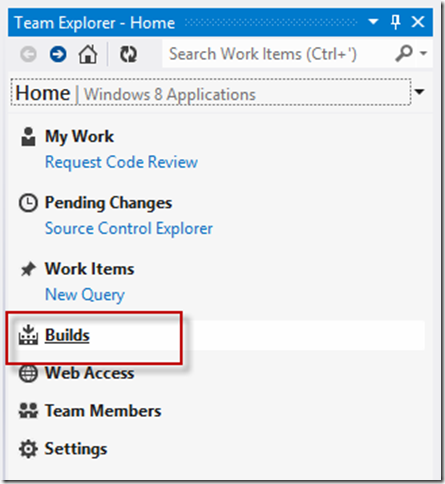
- Open Team Explorer window
- Click on the Build link
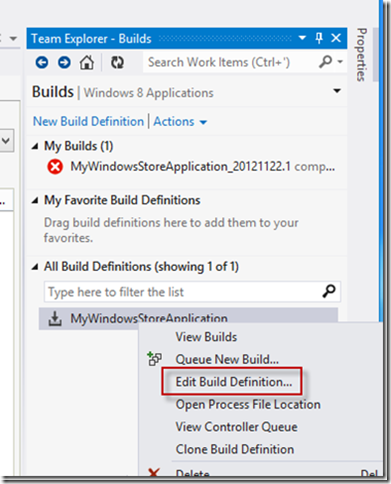
- Right click on the build definition that builds your Windows Store application
- Click on Edit Build Definition
- Click on the Build Defaults tab
- From the Build controller combo box select the build controller created in the previous section
- Click Save
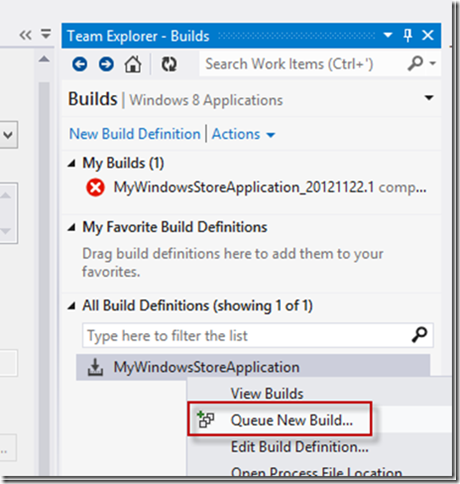
- On the Team Explorer window, right click on the build definition
- Click on Queue New Build
- The build should pass if you don’t have any build errors
-
January 27, 2013 at 3:58 pmBuild Service in Team Foundation Server 2012 Express Part 2 « Ahmed Al-Asaad's Blog
