Archive
TFS 2012: Comparison of Team Foundation Server’s Editions
About TFS Blog Series
This blog post is part of a blog series to introduce Team Foundation Server to new users. The blog series will also contain articles targeting intermediate and expert users. I will be using Team Foundation Server 2012 Update 1 and Visual Studio 2012 Update 1 throughout the series. If you have any questions or you want me to cover a specific topic, please don’t hesitate to contact me.
Expertise Level
Intermediate
Getting Started with Team Foundation Server
TFS comes in three flavours:
- Team Foundation Server Service (tfs.VisualStudio.com)
- Team Foundation Server Express
- Team foundation Server
Choosing which flavour you need depends pretty much on your requirements. In this article I will shed light on each version and why you want to choose one vs the other.
Introducing Team Foundation Server’s Editions
Team Foundation Server Service
TFS Service is the cloud or the hosted version of the TFS. It is currently offered for free and supports up to 5 team users. Microsoft will disclose pricing for other plans in 2013. Microsoft has announced that a Free Plan will be offered. Microsoft will offer away to transition from the free service to the paid service when such a service is announced.
At the time of writing this article, the announced Free Plan includes:
- Up to 5 users
- Unlimited number of projects
- Version control
- Work item tracking (To manage Sprints, Storyboard, Tasks, Bugs, ..etc)
- Agile planning tools (Backlog, Kanban and task boards, Sprint schedule,
- Feedback management (Mechanism to get feedback from stakeholders)
- Team build support
Pro’s
The following is a list of advantages of TFS service compared to the other versions of TFS:
- No installation required. Can be up and running in matters of minutes
- Don’t require purchasing hardware or software to host the TFS
- Data is stored in triplicate on three physically distinct servers
- Full backups are done everyday and with hourly incremental backups
- Service is accessible from anywhere around the world
- TFS Service receives the new TFS updates and features, every 3 weeks, before other versions of TFS
- No licensing required when using the express versions of Visual Studio or none Microsoft platforms such as Eclipse or Xcode
- Scalable, you can scale out the team build by hosting the build service in your enterprise
Con’s
- Paid version plans are not out yet
- Free for upto 5 users
- Lack of Active Directory support
- Maybe slow when getting too many files from the server depending on your connection speed
- Data is not inside your network
- Can’t customize process template or workitem templates
- No SharePoint portal
- Doesn’t come with lab environment. Such environments must must be setup on physical or virtual machines (including Cloud)
- Limited reports and can’t deploy custom reports. You can still use Excel to connect to the service and have your custom reports locally
- Limited migration path from TFS on premise to TFS Service and vise versa
Team Foundation Server Express
TFS Express is a free limited version of Team Foundation Server. It is great for small teams of up to 5 five users. TFS Express can be downloaded from the MSDN website and it is around 500MB. Here is a direct link to the TFS Express home page.
Pro’s
- Free
- Data stays inside your network
- Comes with version control repository
- Work item tracking
- Build Automation
- You have more control compared to the TFS Service
- Can customize Process and Workitems template
- CAL’s can be purchased in case your team grows beyond 5 users
- Support for express versions of Visual Studio
Con’s
- Must have own hardware or virtual machine
- Not accessible from anywhere
- Supports Basic installation only
- Limited Agile Project management features and tools
- No Reporting Integration
- No SharePoint Integration
- Supports only SQL Server Express Edition
- Installed on one machine. Can’t scale out
- Doesn’t support TFS Proxy
- Excludes Preemptive analytics add-on
- Need to manage your own database backups and downtimes in case of hardware failure
- Buy license for the Operating System and CALs if required
Team Foundation Server
This is the full version of TFS. It has no limitations and supports more integration and configuration scenarios. You can buy TFS from the Microsoft Store or one of the Microsoft’s resellers or you could already have a license to use it if you have certain MSDN subscriptions. To read more about licensing, please check the MSDN website or click here to read the licensing white paper.
Pro’s
- Full integration with many products such as SharePoint and reporting services
- Supports higher end versions of SQL Server for the backend as well as Express version
- Supports the express versions of Visual Studio and other Non-Microsoft products (CAL may be required)
- CAL License is included with certain Visual Studio MSDN subscriptions (Professional, Premium and Ultimate)
Con’s
- Must have own hardware and/or virtual machines
- Need to install and configure
- Make sure that all required CALs are purchased
- Could be pricy for small teams
- Not accessible from anywhere
Conclusion
For large and restrictive companies the full edition of TFS would probably be the best option because the data is stored in house, server can be scaled out, supports higher end database editions (standard and enterprise) and can integrate with SharePoint. It all comes with a cost depending on your team size and the number of servers and licenses needed for scaling out the server. But, if your development team(s) already have Visual Studio MSDN subscription, then your company may get a relief on CALs.
For smaller size teams of 5 users or less, it comes down to how much control you need to have over your data and the ability to customize process template and work item templates vs better Agile process and broader availability. If you are interested in the first scenario, TFS Express would be a better option, otherwise you are better off using TFS Service. In case your team can afford the full edition of TFS or your team already have Visual Studio MSDN subscription, you may want to take advantage of full version of TFS. There are programs offered by Microsoft for small businesses such as BizSpark. Check with your local Microsoft office, you may qualify for other offers.
For teams larger than 5 users, you want to calculate how many CALs you need and how much you are paying for them and is it worth it to upgrade to Full Version of TFS.
My conclusion is based on the state of TFS Service as of January 7, 2012 which was explained above.
About Lajak Technologies
A consulting firm in Ottawa, Ontario that provides services related to Microsoft technologies, Team Foundation Server, DevOps practices, security and more. Contact us today to help you solving your complex software problems. Visit us at http://www.lajak.com.
Scale out Team Foundation Service Build Server
Overview
Some Visual Studio projects hosted on tfs.VisualStudio.com (formally known as tfsPreview) require specific build environment or the installation of extra components for the build to succeed. For instance, building Windows store projects requires the build server machine to have Windows 8 operating system and Visual Studio to be installed, building a BizTalk project requires the BizTalk SDK to be installed on the build servers, building Lightswitch applications with extensions requires Visual Studio and the extensions to be installed on the build servers and the list goes on.
In this article, I will setup an on premise Build Server to build Windows Store applications that are hosted in tfs.VisualStudio.com. This article assumes you already have an account with tfs.VisualStudio.com and already have a physical machine or VM with Windows 8 as an operating system and Visual Studio 2012 Express for Windows 8 or higher.
Problem
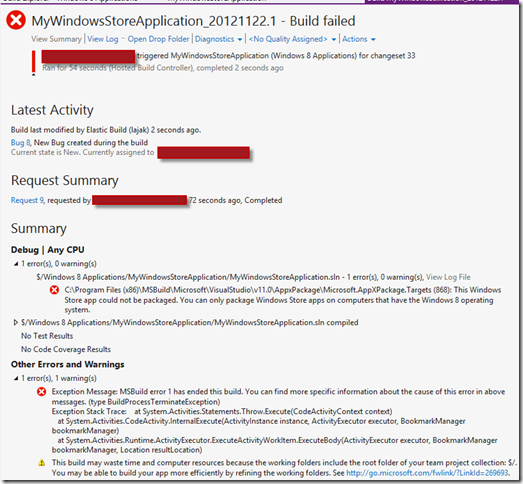
In this article, I have a Windows Store application named “MyWindowsStoreApplication” which is checked in to tfs.VisualStudio.com. Building the MyWindowsStoreApplication using the “Hosted Build Controller” and agent will fail to build as shown in the following figure
The TFS Build fails with the error indicating that Windows 8 operating system is required to package the built Windows Store application.
Solution
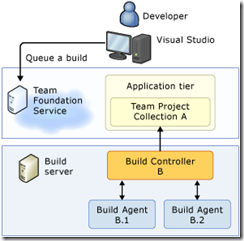
The solution for the problem is to scale out TFS Server’s Build capabilities and host a TFS Build Controller and Build Agent on a computer or VM that has Windows 8 as an operating system.
Prerequisites
The system requirements to build Windows Store applications are:
- Windows 8 Operating System
- Visual Studio 2012 for Windows 8 or higher
Installing TFS Controller and Build Agents
In the following section we will go through the steps needed to create a TFS Build Controller and Build Agents on a local server for the tfs.VisualStudio.com source code repository.
The assumption is that you already have a physical machine or VM that has a Windows 8 operating system and Visual Studio 2012 installed.
The following are the step by step instructions to scale out Tfs.VisualStudio.com build server:
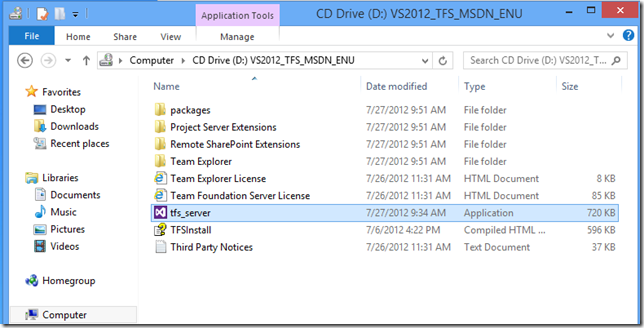
- Insert the TFS2012 DVD or extract the iso file
- Execute tfs_server.exe on the root folder, if you are using TFS Express, you need to execute tfs_express.exe
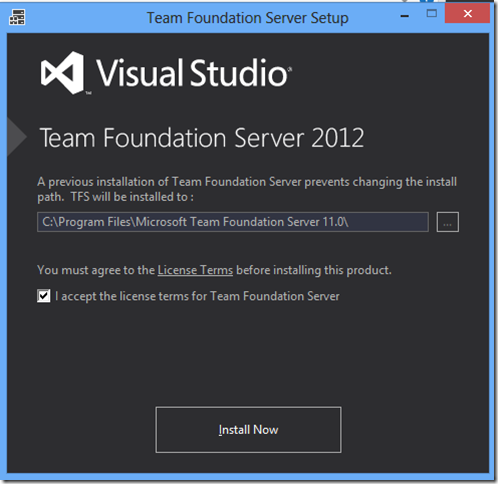
- Accept the license terms for Team Foundation Server
- Click the Install Now button
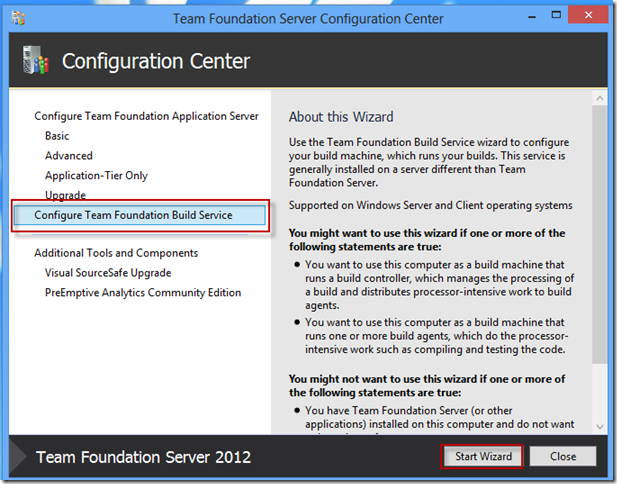
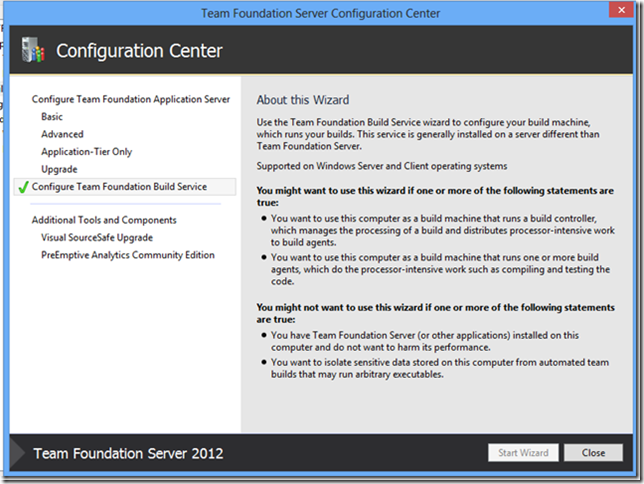
- When the installation is complete, the Team Foundation Server Configuration Center is launched
- Select the Configure Team Foundation Build Service from the list
- Click the Start Wizard button
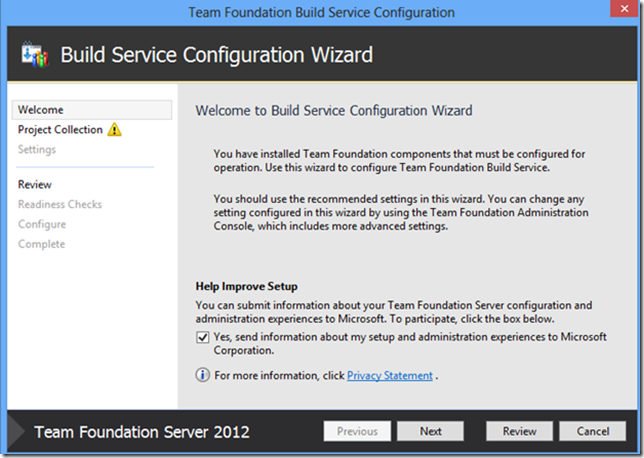
- Click Next in the Build Service Configuration Wizard to move from the Welcome screen to the Project Collection screen
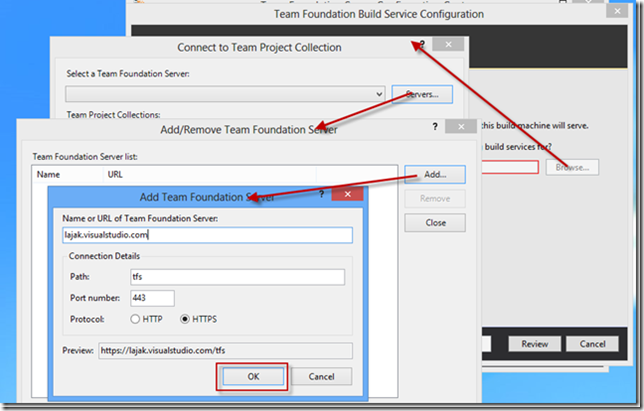
- Click on the Browse button on the Project Collection screen
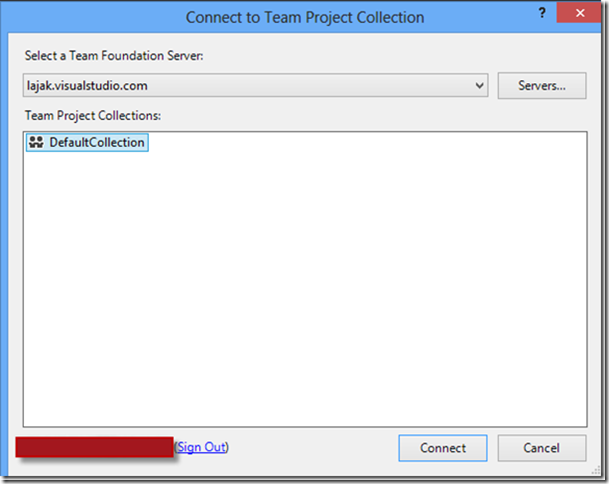
- Click the Servers button on the Connect to Team Project Collection dialog
- Click the Add button on the Add/Remove Team Foundation Server Dialog
- Type the name or URL of your team foundation server and select the HTTPS protocol
- Click the OK button
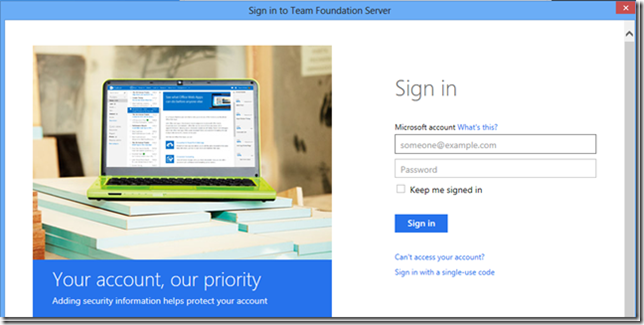
- Once the OK button is clicked, the Sign in to Team Foundation Server window will be launched
- Enter your tfs.VisualStudio.com email address and password
- Click the Sign in button
- Your Team Foundation Server should show up in the Connect to Team Project Collection dialog
- Click the Connect button
- Now we are back to the Build Service Configuration Wizard, in my case, I haven’t configured on premise TFS build controllers or agent before. Hence, I am getting the Found 0 build controllers and 0 build agents message
- Click the next button
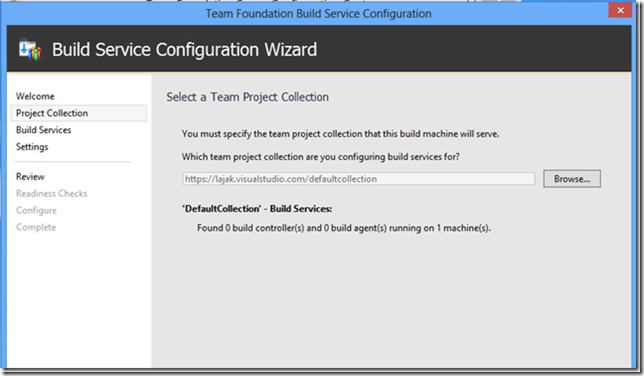
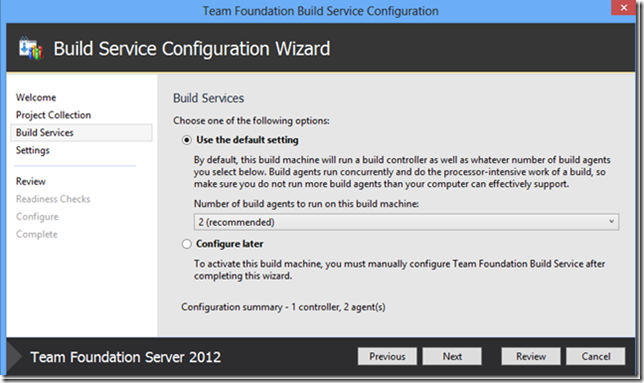
- On the Build Services screen, select Use the default setting. For illustration purposes, I kept the number of build agents to 2. The number of build agents allows to run multiple builds concurrently
- Click the Next button
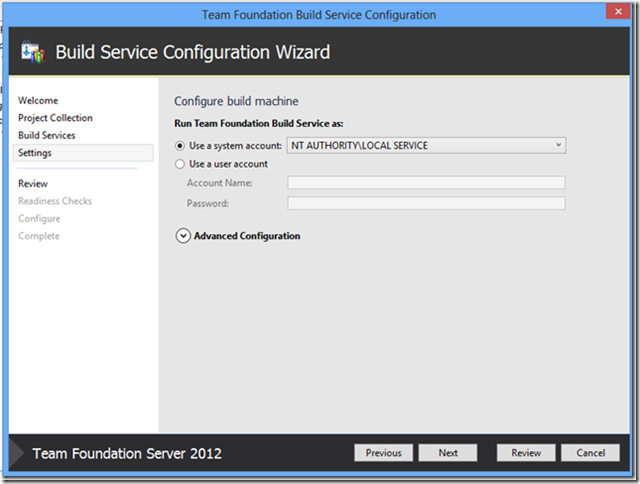
- On the Settings screen, the default option is Use a system account option is selected. The Local Service account is selected by default if the machine is not part of a domain. Network Service account is selected by default if the machine is part of a domain
- Click the Next button
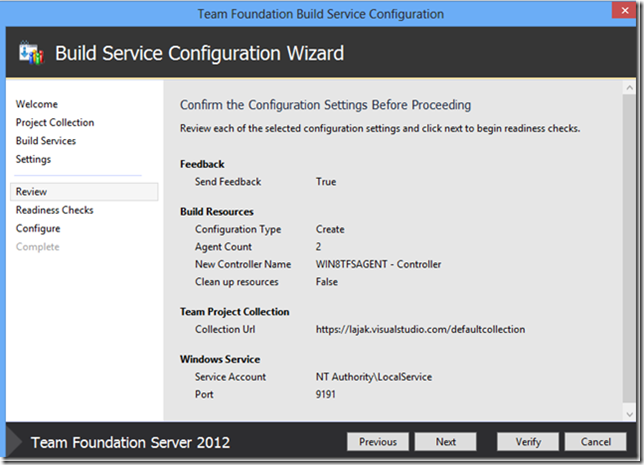
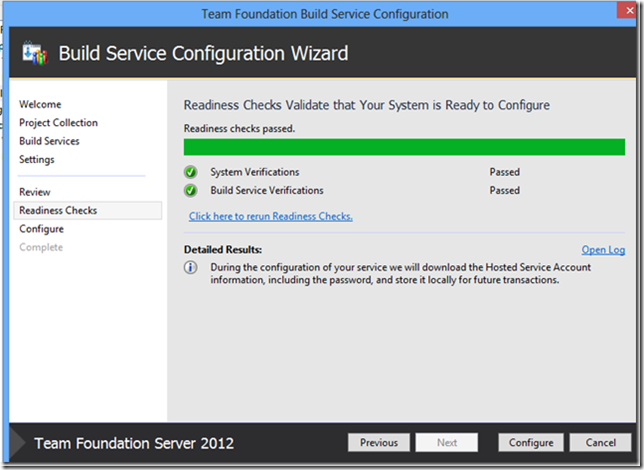
Review the settings and click the Verify button to verify the settings
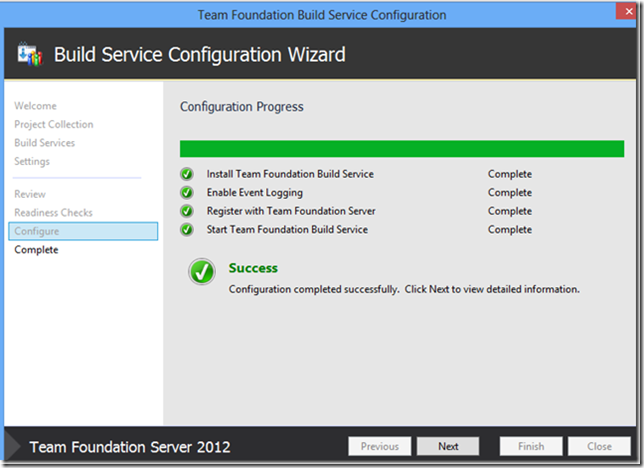
Click the Configure button
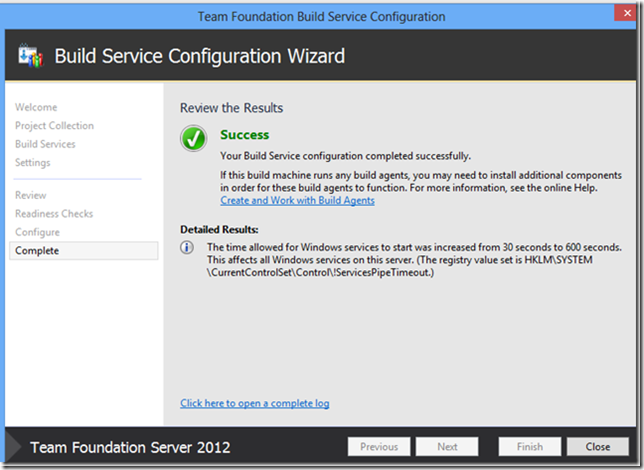
If the configuration is complete successfully, click on the Next button and then close the Team Foundation Build Service Configuration window
- Back at the Team Foundation Server Configuration Center, you should see a green check mark which indicates that the service is configured
- Close the dialog if you don’t want to configure other sections
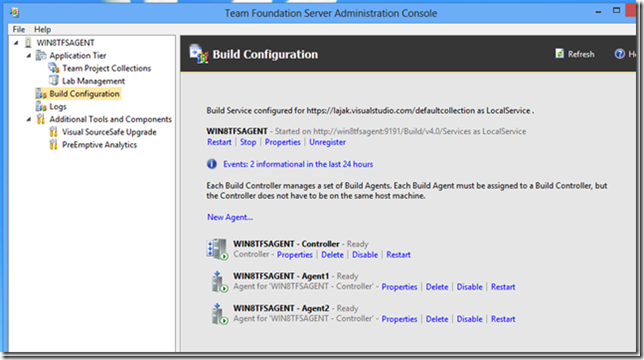
- Open the Team Foundation Server Administration Console
- Click on the Build Configuration node
- Notice that the controller and the Agents are in a healthy state and enabled (green icon). A red error icon would show up instead in the case the controller or the agents are disabled
Modify Build Definition
- Open Visual Studio on your development machine
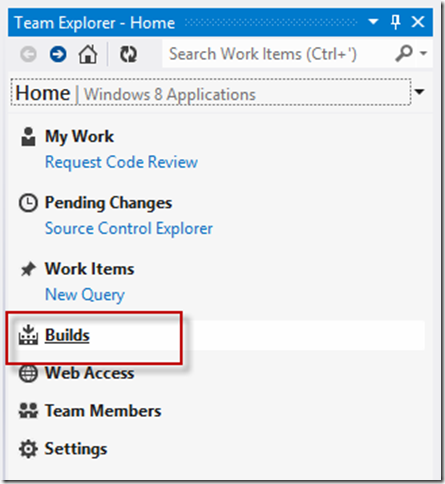
- Open Team Explorer window
- Click on the Build link
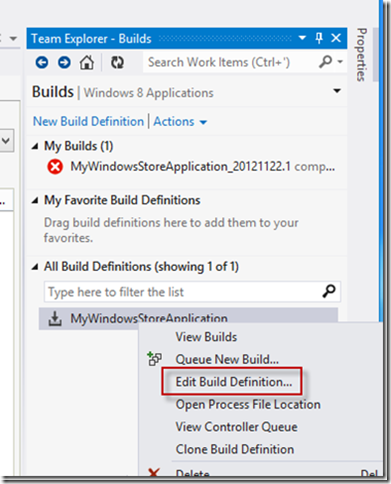
- Right click on the build definition that builds your Windows Store application
- Click on Edit Build Definition
- Click on the Build Defaults tab
- From the Build controller combo box select the build controller created in the previous section
- Click Save
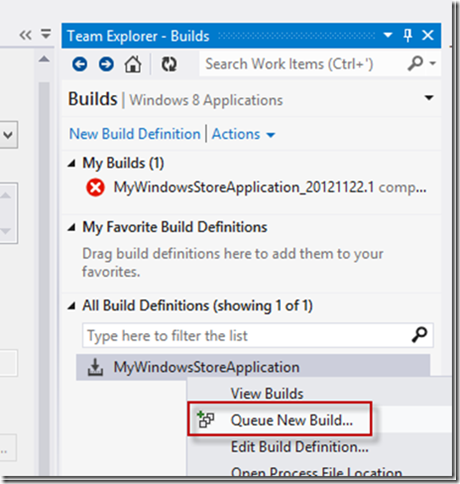
- On the Team Explorer window, right click on the build definition
- Click on Queue New Build
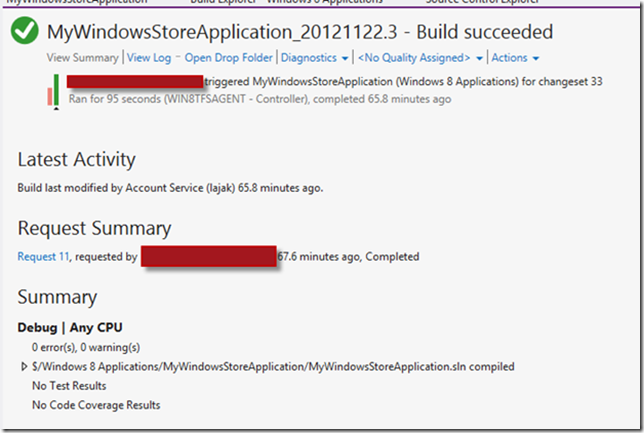
- The build should pass if you don’t have any build errors
TFS Preview: How to setup Alerts for your project
In this post, I will show how to setup the alerts for you project collection hosted by TFS Preview.
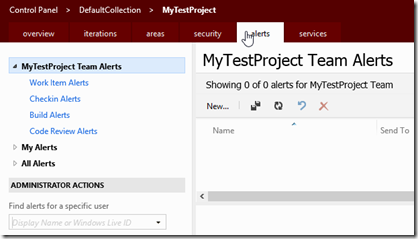
You can setup the alerts from the TFS preview website where you can setup the alerts from any machine without the need to have Visual Studio installed.
- Login to the tfsPreview website
- Open your project
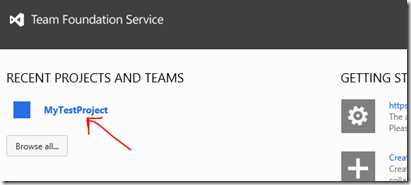
- Click on the chevron next to the email address at the top
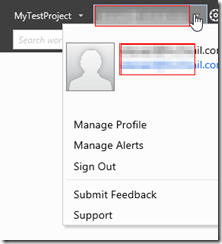
- Click Manage Alerts
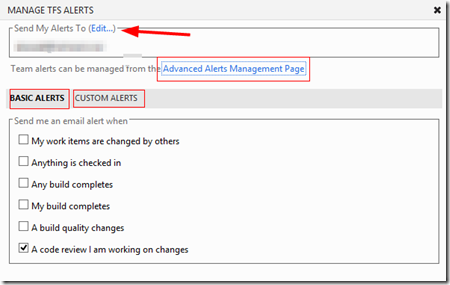
- You need to click the Edit link if you want to alerts to be sent to a different or multiple email address. Multiple email addresses must be separated by a comma followed by space (e.g. testemail@host.com, testemail2@host.com) as of today’s date. This may be changed in the future. Be aware that changing the Send My Alerts To will change the email for all alerts.
- IMPORTANT When you change the email address, you should receive a confirmation email. You need to confirm the action for the change to take affect
- You can click on Custom Alerts or Advanced Alerts Management Page for advanced alerts.
- Custom Alerts link allows you to modify the filter, email format
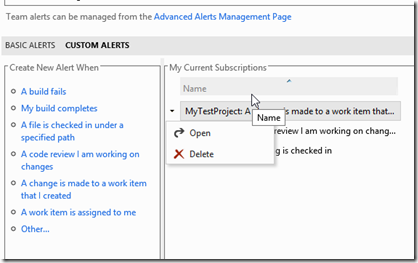
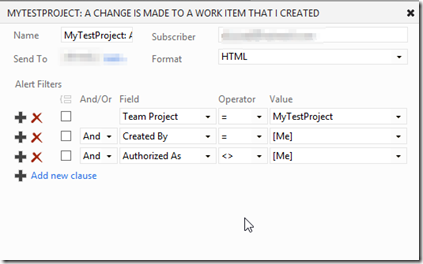
- Advanced Alerts Management page allows you to create new alert type
Connect Visual Studio 2012 to TFS Preview
At the time of writing this blog post, Visual Studio 2012 wasn’t RTM and was in the RC release.
In this post, I will walk you through connecting Visual Studio 2012 to TFS preview. This is a fairly simple task and can be done in two ways.
Approach 1
- Login to your TFS preview server account
- browser a project you created, if you haven’t created a project yet, you can follow this post to create one
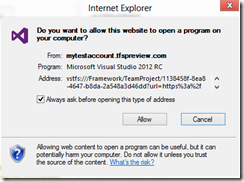
- On the project portal, click on Open new instance of Visual Studio (this will only work on IE)
- Click Allow to launch VS2012
- Visual studio will ask you to enter your windows live credential. Enter the account info associated with your tfs preview

- You are done

Approach 2
- Open Visual Studio 2012
- On the Start screen, click connect to TFS
- You maybe asked to enter a live account
- On the Connect to Team Foundation Server dialog, click the servers button
- Click the add button
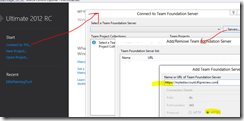
- Enter your TFS Preview server information. Remember to select https or type https part of the URL
- Then click on the connect button
Map Workspace to folder
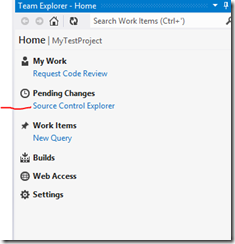
- In Team Explorer, click on Source Control Explorer
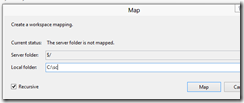
- Select the collection Node and then click on the Not Mapped link
- I usually map source control to the root of one of my drivers to avoid hitting the 254 characters path limit
- Click map
- Click Yes to download the contents of your source control to your workspace
Create a Team Project in TFS Preview
Microsoft made it very simple to accomplish this task…I mean creating a team project ![]()
Simply
- Browse to the your TFS server URL. If you didn’t create one yet, follow this post
- You should see the following screen
- Click on Create a team project
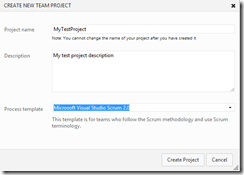
- Enter project name, description and select the project template
- Click the Create Project button. It should take about 3 minutes to complete creating the project
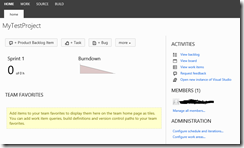
- Click on Navigate to project
- Now you are at the project portal
