Archive
Customize Build Template in TFS2012 to Build All Solutions-Part 2
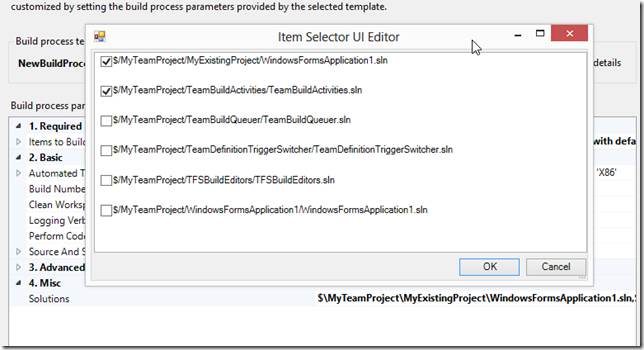
This post improves the Users Experience for Customize Build Template in TFS2012 to Build All Solutions-Part 1 solution. In this article, I will create a custom editor (dialog box) that will show all solutions in the source control repository and comma separate the selected values into the value cell of the Solutions argument we created in the previous post. The editor also reads the value in the PropertyGrid and select the matching solutions in the dialog.
History and Credits
I built this solution to generate MSI’s for Biztalk projects with the deployment framework after building the solution back in 2011 or early 2012. But to simplify the example, I am using this approach to build the selected solutions in the version control. I remember at the time I learned how to build a UIEditor for the build definition from http://blogs.msdn.com/b/jpricket/archive/2010/01/18/tfs-2010-custom-process-parameters-part-3-custom-editors.aspx
Create the Solutions’ Selector Dialog
My approach to create the dialog starts by creating the following files
C# Library Project: I am calling it TFSBuildEditors
SelectableItemsUIEditor.cs: this is the editor class that need to be referenced with the argument. It is also responsible for launching the dialog. Class extends UITypeEditor.
SelectableItemsForm: this is a WindowsForm Item. To launch the dialog (form) we need a reference to IWindowsFormsEditorService. That service supports only Windows Form instances.
SelectableItemsControl.xaml: I am using a WPF control here which is embedded into the WindowForm window. I am using an Element Host control to do so. I am using WPF control here because it makes my life easier by using binding 🙂
SelectableItem.cs: is a class the contains two properties: Item and IsItemChecked.
TfsHelper.cs: Contains some of the code we used in the previous post to retrieve the solutions from source control.
Creating the Project
Create a C# library project targeting .NET 4.5 (I am using Visual Studio 2012)
Add the following references:
Microsoft.TeamFoundation.Build.Client.dll
Microsoft.TeamFoundation.Client.dll
Microsoft.TeamFoundation.VersionControl.Client.dll
Creating TfsHelper
Add a folder, I am calling it TFSAPI
Added a c# class and call it TfsHelper.cs
Add the following code:
using System.Collections.Generic;
 using System.Linq;
 using Microsoft.TeamFoundation.VersionControl.Client;

namespace TFSBuildEditor.TFSApi
 {
 public class TfsHelper
 {
 public static IEnumerable<string> GetPathList(string pattern,
 VersionControlServer versionControlServer)
 {
 List<string> solutionList = new List<string>();
 var lists = versionControlServer.GetItems(pattern,
 VersionSpec.Latest,
 RecursionType.Full,
 DeletedState.NonDeleted,
 ItemType.File);

if ( lists.Items.Any())
 {
 var list = lists.Items
 .Select(i => i.ServerItem)
 .ToList();
 return list;
 }

return solutionList; ;
 }
 }
 }
SelectableItem
Create a C# class and call it SelectableItem
Use the following code to define it
using System;
 using System.ComponentModel;

namespace TFSBuildEditor
 {
 public class SelectableItem : INotifyPropertyChanged
 {
 private string item;
 public string Item
 {
 get { return item; }
 set
 {
 if (value != item)
 {
 item = value;
 OnPropertyChange("Item");
 }
 }
 }

private Boolean isItemChecked;
 public Boolean IsItemChecked
 {
 get { return isItemChecked; }
 set
 {
 if (value != isItemChecked)
 {
 isItemChecked = value;
 OnPropertyChange("IsPathChecked");
 }
 }
 }

public event PropertyChangedEventHandler PropertyChanged;

public void OnPropertyChange(string propertyName)
 {
 if (PropertyChanged != null)
 {
 PropertyChanged(this, new PropertyChangedEventArgs(propertyName));
 }

}
 }
 }
SelectableItemControl.xaml
Add a WPF User Control to the project
I am using the following code for the xaml
<UserControl x:Class="TFSBuildEditor.SelectableItemsControl"
xmlns="<a href="http://schemas.microsoft.com/winfx/2006/xaml/presentation"">http://schemas.microsoft.com/winfx/2006/xaml/presentation"</a>
xmlns:x="<a href="http://schemas.microsoft.com/winfx/2006/xaml"">http://schemas.microsoft.com/winfx/2006/xaml"</a>
xmlns:mc="<a href="http://schemas.openxmlformats.org/markup-compatibility/2006"">http://schemas.openxmlformats.org/markup-compatibility/2006"</a>
xmlns:d="<a href="http://schemas.microsoft.com/expression/blend/2008"">http://schemas.microsoft.com/expression/blend/2008"</a>
mc:Ignorable="d"
d:DesignHeight="300" d:DesignWidth="300">
<Grid>
<Grid.RowDefinitions>
</Grid.RowDefinitions>
<ListBox Margin="0,0,0,0" Name="SelectableItemsList" ItemsSource="{Binding ItemsCollection}">
<ListBox.ItemTemplate>
<DataTemplate>
<StackPanel Margin="0,0,0,17" Orientation="Horizontal">
<CheckBox IsChecked="{Binding IsItemChecked, Mode=TwoWay}"/>
<TextBlock Text="{Binding Item, Mode=TwoWay}" TextWrapping="Wrap"/>
</StackPanel>
</DataTemplate>
</ListBox.ItemTemplate>
</ListBox>
</Grid>
</UserControl>
SelectableItemsForm
Add a WindowsForm to the project
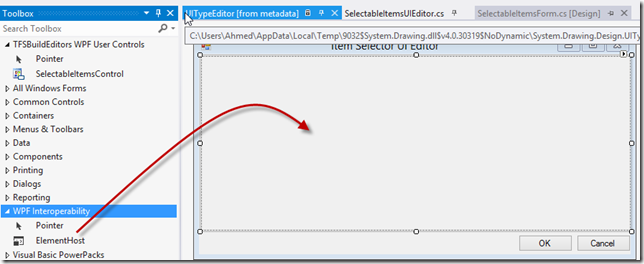
Add an ElementHost, OK button and a Cancel button. Adjust the anchor property for each of the controls
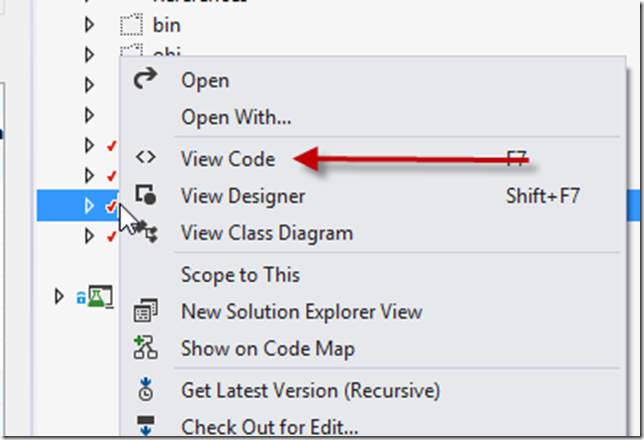
Right click on the form in the solution explorer and click view code
I am using the following code, I added comments to make easier to understand what I am doing
using System;
 using System.Collections.Generic;
 using System.ComponentModel;
 using System.Data;
 using System.Drawing;
 using System.Linq;
 using System.Text;
 using System.Windows.Forms;
 using System.Collections.ObjectModel;
 using Microsoft.TeamFoundation.VersionControl.Client;
 using TFSBuildEditor.TFSApi;

namespace TFSBuildEditor
 {
 public partial class SelectableItemsForm : Form
 {
 public SelectableItemsForm()
 {
 InitializeComponent();

}

//Property will hold the comma separated values
 public string SelectedItems { get; set; }

//VersionControlServer instance
 public VersionControlServer VersionControlServer { get; set; }

//Collection is bound to the WPF control
 private ObservableCollection<SelectableItem> itemsCollection = null;
 public ObservableCollection<SelectableItem> ItemsCollection
 {
 get
 {
 if (itemsCollection == null)
 {
 itemsCollection = new ObservableCollection<SelectableItem>();
 }
 return itemsCollection;
 }
 set
 {
 itemsCollection = value;
 }
 }

public void Initialize()
 {
 InitializeWPFControl();
 //Idealy you want to read the workspace map
 var projList = TfsHelper.GetPathList("$/*.sln", VersionControlServer);

List<string> selectedProjects = new List<string>();

//Is the value in the propery grid null or whitespace
 if (!string.IsNullOrWhiteSpace(SelectedItems))
 {
 //convert comma seperated string to List<string>
 selectedProjects = SelectedItems.Replace(@"\", @"/").Split(char.Parse(",")).ToList();
 }

//Value cell had valid entries
 if (selectedProjects.Any())
 {
 //for each solution in version control
 foreach (var item in projList)
 {
 //Build the ItemsCollection (list of solutions) and set IsItemCheck to true if
 //The solution was checked before or typed properly in the value cell
 ItemsCollection.Add(
 new SelectableItem
 {
 IsItemChecked = (selectedProjects.Contains(item) ? true : false),
 Item = item
 }
 );
 }
 }
 else
 {
 foreach (var item in projList)
 {
 ItemsCollection.Add(new SelectableItem { IsItemChecked = false, Item = item });
 }
 }

}

private void InitializeWPFControl()
 {
 //Create new instance of the wpf control
 var selectableItemsControl = new SelectableItemsControl();
 //bind the windows form to teh WPF control
 selectableItemsControl.DataContext = this;
 //Assign the wpf control to the element host
 this.elementHost1.Child = selectableItemsControl;
 }

private void Cancel_Click(object sender, EventArgs e)
 {
 this.Close();
 }

private void OkButtons_Click(object sender, EventArgs e)
 {
 //Selected solutions?
 if (ItemsCollection.Any())
 {
 //comma seperate selected solutions
 SelectedItems = string.Join(",", ItemsCollection.Where(p => p.IsItemChecked)
 .Select(p => p.Item)
 .ToArray()).Replace(@"/", @"\");

}
 else
 {
 //Set SelectedItems to empty string
 SelectedItems = string.Empty;
 }
 DialogResult = System.Windows.Forms.DialogResult.OK;
 this.Visible = false;
 }

}
 }
SelectableItemsUIEditor
This Edit will be used later on in the meta data of the WorkFlow build Template. It is the entry point to launch the dialog. I am using the following code
using System;
 using System.Drawing.Design;
 using System.ComponentModel;
 using System.Windows.Forms.Design;
 using System.Windows.Forms;
 using Microsoft.TeamFoundation.VersionControl.Client;

namespace TFSBuildEditor
 {
 public class SelectableItemsUIEditor:UITypeEditor
 {
 public override object EditValue(ITypeDescriptorContext context, IServiceProvider provider, object value)
 {
 if (provider != null)
 {
 IWindowsFormsEditorService editorService = (IWindowsFormsEditorService)provider.GetService(typeof(IWindowsFormsEditorService));

if (editorService == null)
 {
 return value;
 }

//create new instance of the windows form
 using (SelectableItemsForm dialog = new SelectableItemsForm())
 {
 //set the VersionControlServer property
 dialog.VersionControlServer = (VersionControlServer)provider.GetService(typeof(VersionControlServer));

//Set the SelectedItems string property to the value from the property grid
 dialog.SelectedItems = value as string;

//Call initialize method that calls the tfs api and build the wpf control and populate it with data
 dialog.Initialize();

//Show dialog
 if (editorService.ShowDialog(dialog) == DialogResult.OK)
 {
 value = dialog.SelectedItems;
 }
 }
 }

return value;
 }

public override UITypeEditorEditStyle GetEditStyle(ITypeDescriptorContext context)
 {
 return UITypeEditorEditStyle.Modal;
 }

}
 }
Deploy the editor
Build the project
Copy the dll and the pdb file to C:\Program Files (x86)\Microsoft Visual Studio 11.0\Common7\IDE\PrivateAssemblies
Modify build template
Open the build definition template from Source Control\BuildProcessTemplate
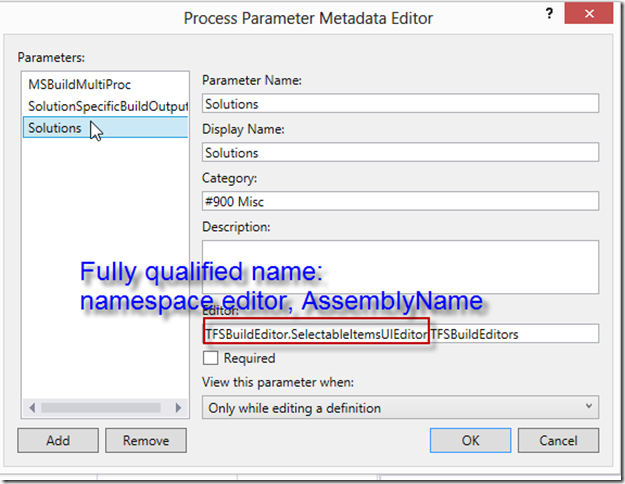
Click on the small button next to the default value for the Metadata argument
The parameter name must match the name of the argument
Fill the Editor’s textbox with the fully qualified name for the editor
Click OK and Check in the Build Process Template
Testing
Close and open Visual Studio
Open your build definition
To debug, open another instance of Visual Studio and attached it other instance that has the build definition open
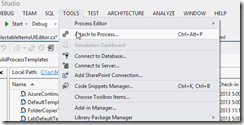
Click on Tools—>Attach to Process
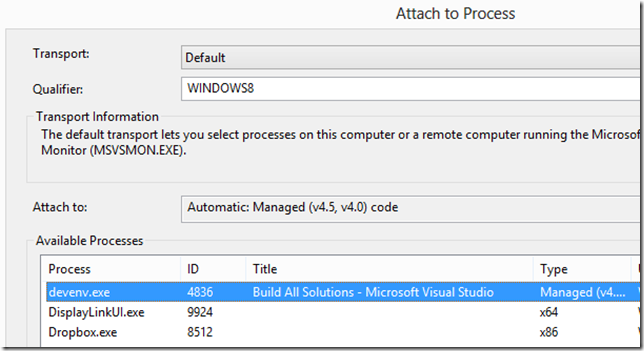
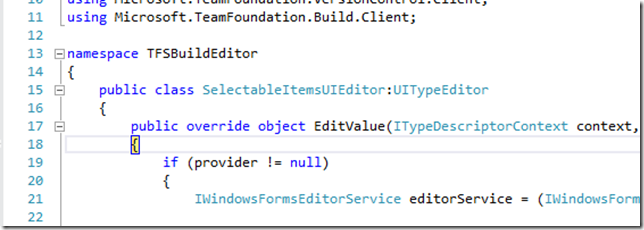
Select devenv.exe and click attach. Make sure your code has a break point in the EditValue method in SelectableItemsUIEditor and then click on the ellipsis button in the build definition
Customize Build Template in TFS2012 to Build All Solutions-Part 1
Introduction
In this article, I will show one way to build all solutions in source control. I will add a new argument to a build template which holds a comma separated string of solutions and I will be using a tool I built in the previous post (can be found here). In the next article, I will reuse the code to build a UIEditor to edit the argument we are passing to the build definition.
Modify the Build Template
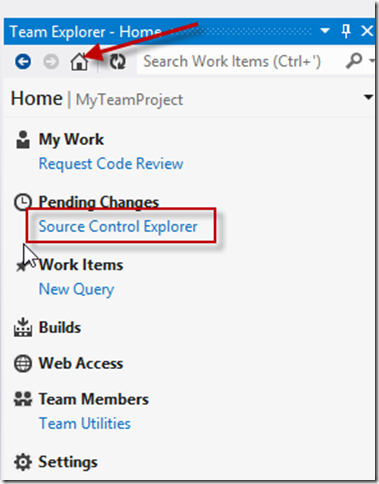
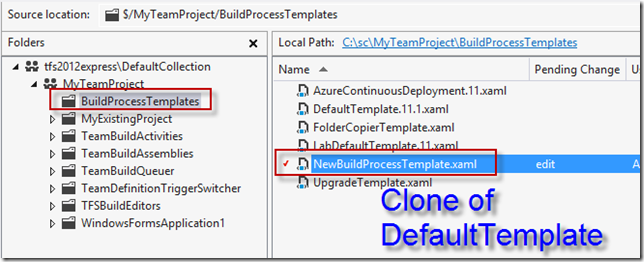
In Team Explorer, click on the Source Control Explorer.
Open your build template. Here I am opening a clone of the Default template.
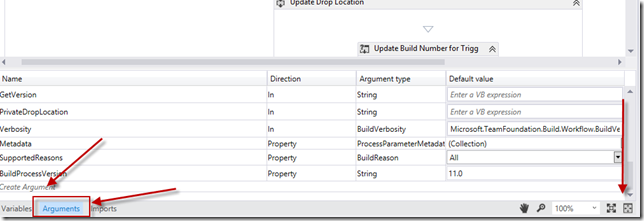
Click on the Arguments tab at the bottom and scroll down. Then click on Create Argument.
Rename the argument to Solutions. The argument will hold comma separated string of solutions.
Collapse the Arguments tab by clicking on it.
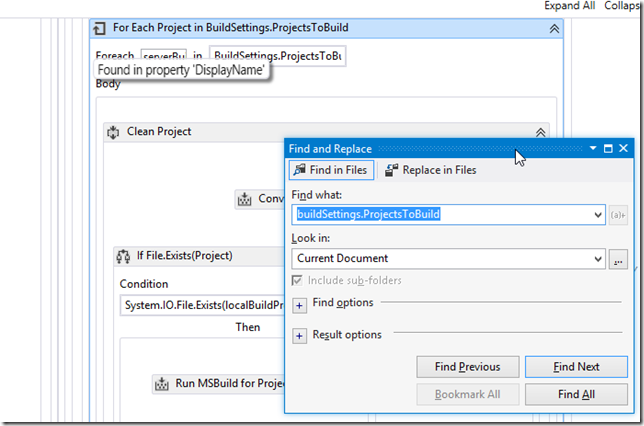
One of the new features in Visual Studio 2012 is the ability to search or find text in a Work Flow document. Press ctrl + F and find BuildSettings.ProjectsToBuild.
There are two instances that need to be replaced with Solutions.Split(“,”c), VB code ![]() : One in the Clean Configuration sequence and the other in Compile and Test for Configuration sequence. While you are there, change the Display Name the For Each loop if you want to.
: One in the Clean Configuration sequence and the other in Compile and Test for Configuration sequence. While you are there, change the Display Name the For Each loop if you want to.
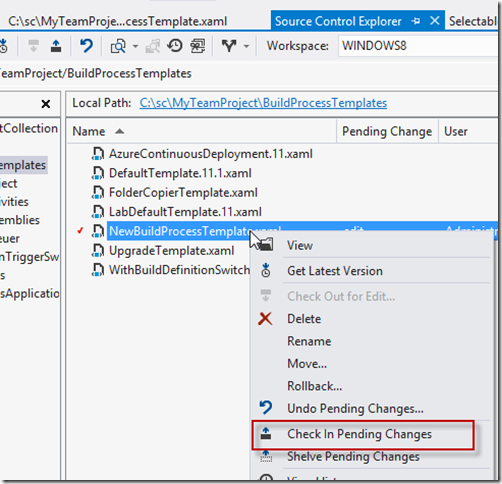
Save and Check in.
Modify Build Definition
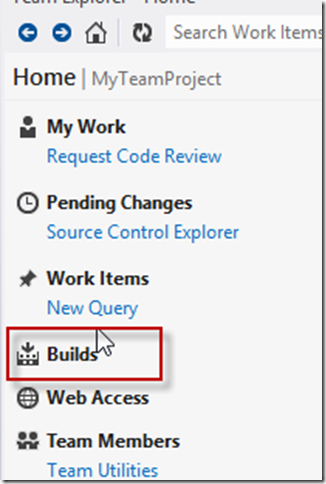
Go to Builds in Team Explorer.
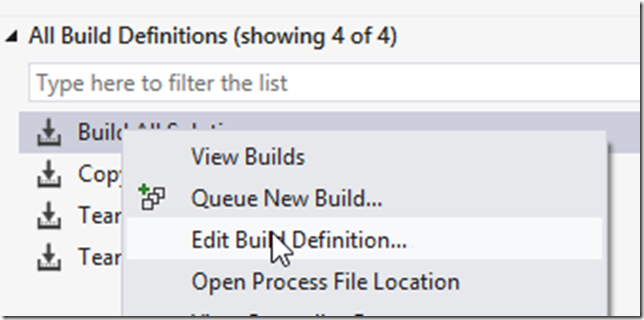
Edit an existing build or create a new build definition.
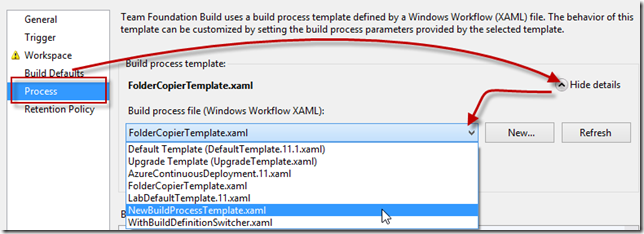
Go to the process tab, expand Show Details.
From the drop down select the Build process File you modified.
Launch the tool that finds all solutions in source control (Check this article).
Copy the found solutions.
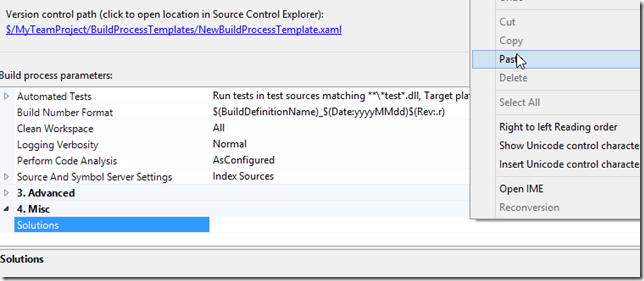
Paste the copied value into the Solutions argument.
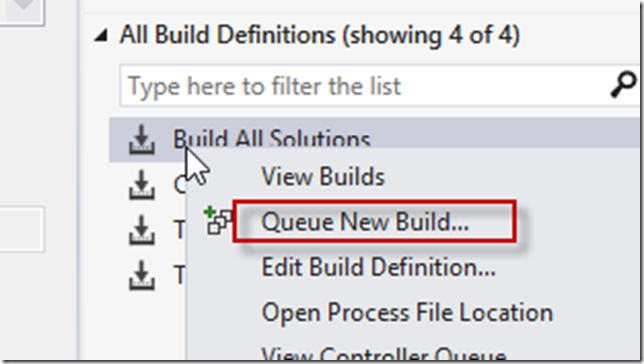
Save and queue a build
In my repository, I have 6 solutions and they all got built 🙂
In part two, I will create a UI Editor to avoid launching the solutions finder tool.
TFS 2012 API: Find all Solutions in Source Control
In this article, I am going to show how you can retrieve source control to find all solutions. Actually the solution I am provide can find any specific file or pattern. The code supports wildcard search. I AM NOT DOING ANY VALIDATION TO KEEP THE CODE SHORT. If more than one match found, my code will comma separate them. We will use this code in a later post to incorporate it in a Team Build Definition to build all solutions in the Source Control.
Start by Create a WPF Application
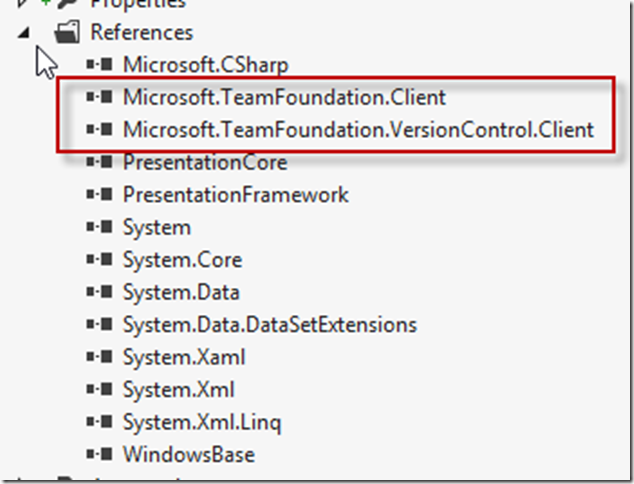
Add the following references:
Microsoft.TeamFoundation.Client
Microsoft.TeamFoundation.VersionControl.Client
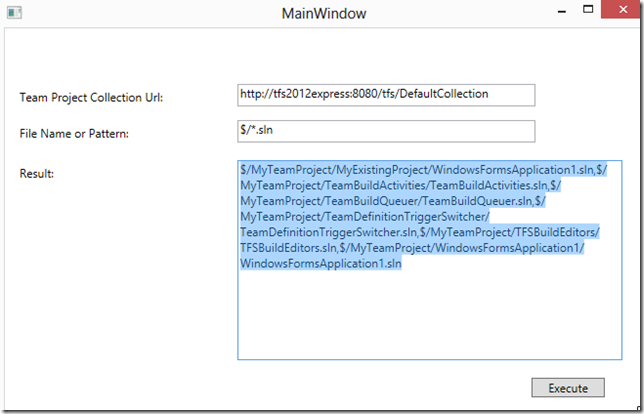
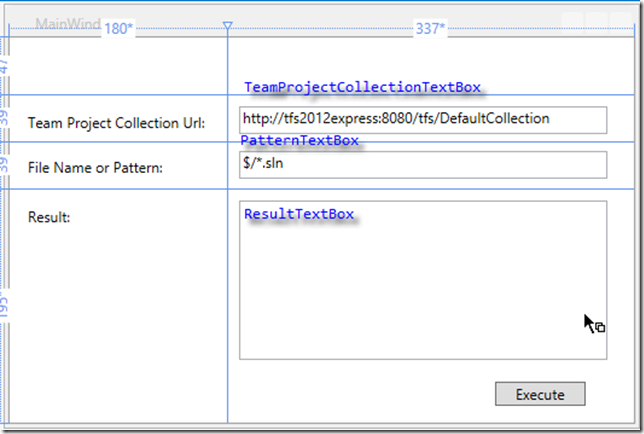
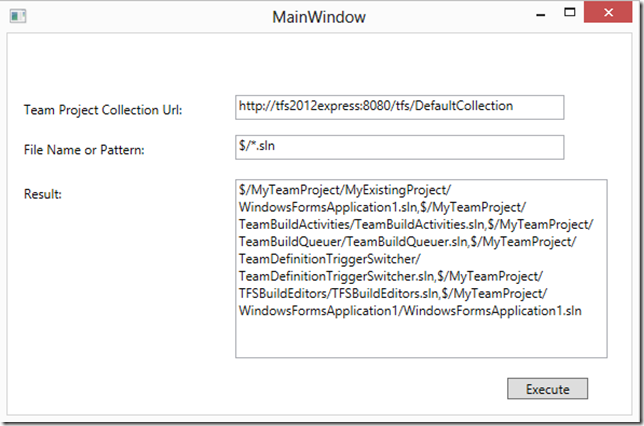
Build the following UI but replace the values in the textboxes with your team project Url and file pattern respectively:
The following code is in the code behind
private void Button_Click_1(object sender, RoutedEventArgs e)
{
//Get Team Project collection form Uri
var teamProjectCollection = GetTeamProjectCollection(new Uri(TeamProjectCollectionTextBox.Text));

//Get version control instance from team project collection
var versionControlServer = GetVersionControlServer(teamProjectCollection);

//Get server path for all files with pattern
var pathList = GetPathList(PatternTextBox.Text, versionControlServer);

//Comma separate results
ResultTextBox.Text = string.Join(",", pathList);

}

private IEnumerable<string> GetPathList(string pattern,
VersionControlServer versionControlServer)
{
List<string> solutionList = new List<string>();

//Get items with pattern (must be prefixed with root path (server or local))
// for example $/ or C:\sc
//Version sepc = latest code
// recursionType = Full =  search sub folders
// DeletedState =  only non-deleted files
//ItemType = files
var lists = versionControlServer.GetItems(pattern,
VersionSpec.Latest,
RecursionType.Full,
DeletedState.NonDeleted,
ItemType.File);

if (lists.Items.Any())
{
var list = lists.Items
.Select(i => i.ServerItem)
.ToList();
solutionList.AddRange(list);
}

return solutionList; ;
}

private VersionControlServer GetVersionControlServer(TfsTeamProjectCollection tfsTeamProjectcollection)
{
var versionControlServer = tfsTeamProjectcollection.GetService<VersionControlServer>();

return versionControlServer;
}

private TfsTeamProjectCollection GetTeamProjectCollection(Uri uri)
{
var tfs = TfsTeamProjectCollectionFactory.GetTeamProjectCollection(uri);

tfs.EnsureAuthenticated();
return tfs;
}
Build Service in Team Foundation Server 2012 Express Part 2
In this video I am going through the Team Foundation Server’s Build Server Topologies. This video applies for both TFS and TFS express. To learn about scaling out TFS Service (formally know as TFS Preview) Click https://lajak.wordpress.com/2012/12/13/scale-out-team-foundation-service-build-server/
TFS2012: Schedule a One Time Team Build-Approach 2
In response to the questions asked on MSDN social, I am writing this blog post. The question was “How to schedule a one off build”.
Introduction
I already blogged approach1 to solve this issue. In this approach, I am building a simple console application that takes three arguments: TFS Team Project Collection URL, Team Project Name and Team Build Definition Name. The console application will then be scheduled through the Windows Task Scheduler. The build definition is manually triggered.
Creating Console Application
Create a new Windows console Application and called TeamBuildQueuer
Add the following assemblies as references
Microsoft.TeamFoundation.Build.Client
Microsoft.TeamFoundation.Client
Microsoft.TeamFoundation.Common
The following is a simple implementation for the Program.cs class. You can make it fancier ![]()
using System;
using System.Collections.Generic;
using System.Linq;
using System.Text;
using Microsoft.TeamFoundation.Build.Client;
using Microsoft.TeamFoundation.Client;
using Microsoft.TeamFoundation.Framework.Common;

namespace TeamBuildQueuer
{
public class Program
{
public static void Main(string[] args)
{
if (args.Length < 3)
{
Output("Usage TeamBuildQueuer TFSUrl teamProjectName buildDefinitionName");
return;
}

var tfsUri = args[0];
var teamProjectName = args[1];
var buildDefinitionName = args[2];

TfsTeamProjectCollection tfs = TfsTeamProjectCollectionFactory.GetTeamProjectCollection(new Uri(tfsUri));
if (tfs == null)
{
Output("Can't find TfsTeamProjectCollection");
return;
}
tfs.EnsureAuthenticated();
IBuildServer buildServer = tfs.GetService<IBuildServer>();

if (buildServer == null)
{
Output("Can't find build server");
return;
}

IBuildDefinition buildDefinition = buildServer.GetBuildDefinition(teamProjectName, buildDefinitionName);

if (buildDefinition == null)
{
Output("Can't find build definition");
return;
}

buildServer.QueueBuild(buildDefinition);

}

private static void Output(string message)
{
Console.WriteLine(message);
Console.ReadKey();
}
}
}
Build the application
Debugging the application
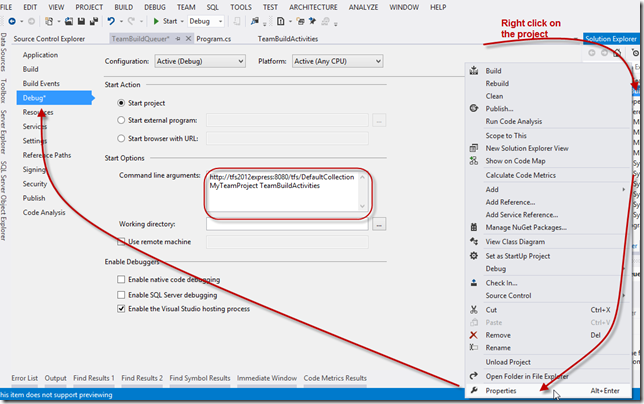
Right click on the project and click on Properties
Click on the Debug tab
Type the three arguments separated by spaces
Run the application
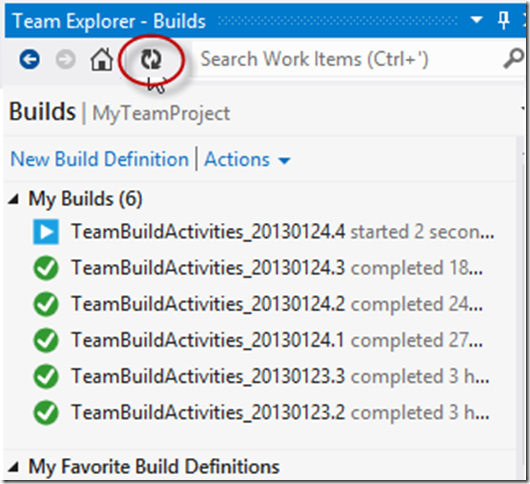
Hit the refresh button if you already have visual studio open. You should see the build is queued
Schedule the Console Application
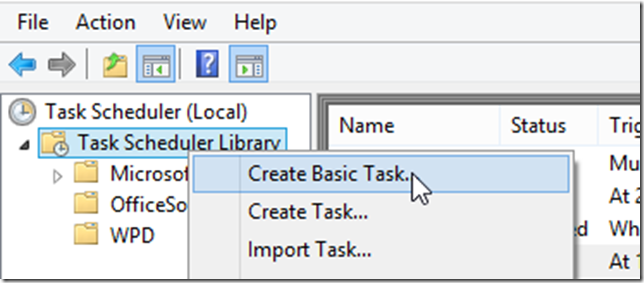
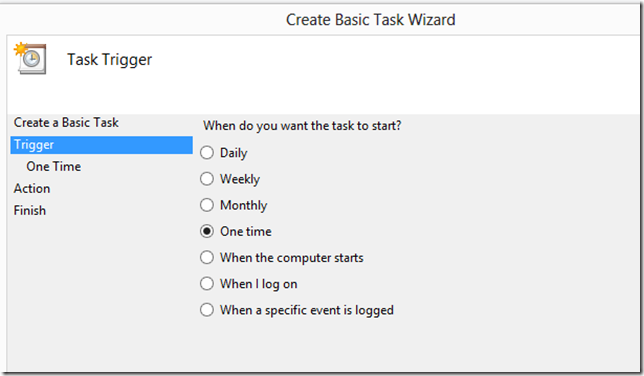
Find the Task Scheduler application. In Windows 8 I had to search for it from the Start Screen
I named it Queue Build
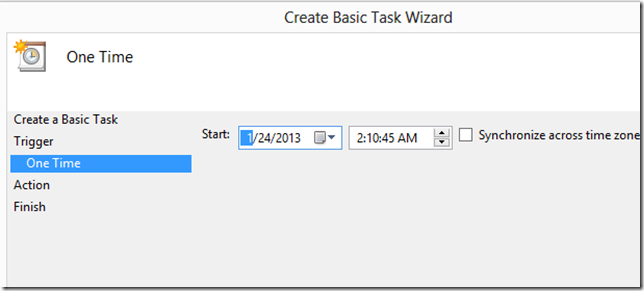
Specify the date and time for the Task to run at
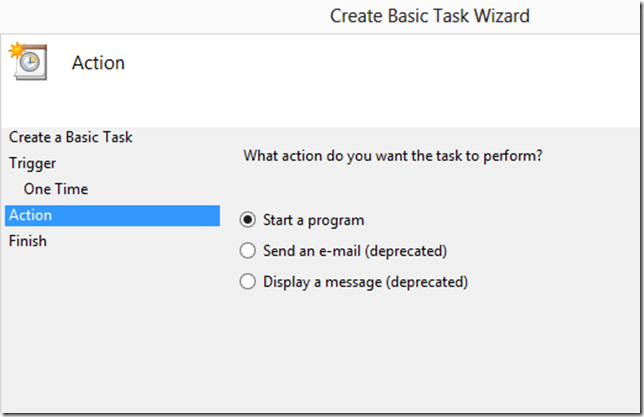
Keep Start a program selected
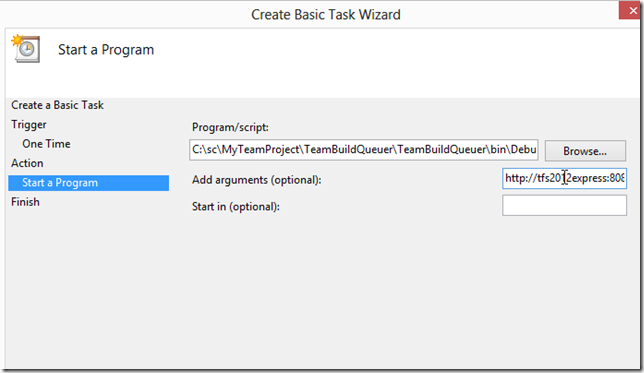
In my case, I am using the following arguments:
http://tfs2012express:8080/tfs/DefaultCollection MyTeamProject TeamBuildActivities
again space seperated
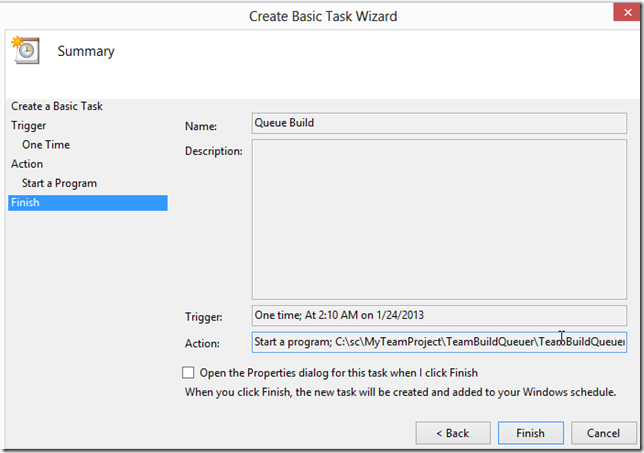
Review and click Finish
Conclusion
This approach is simpler than the previous article I wrote. You don’t need to do any modifications to the build template and you have more flexibility when it comes to scheduling patterns.

